
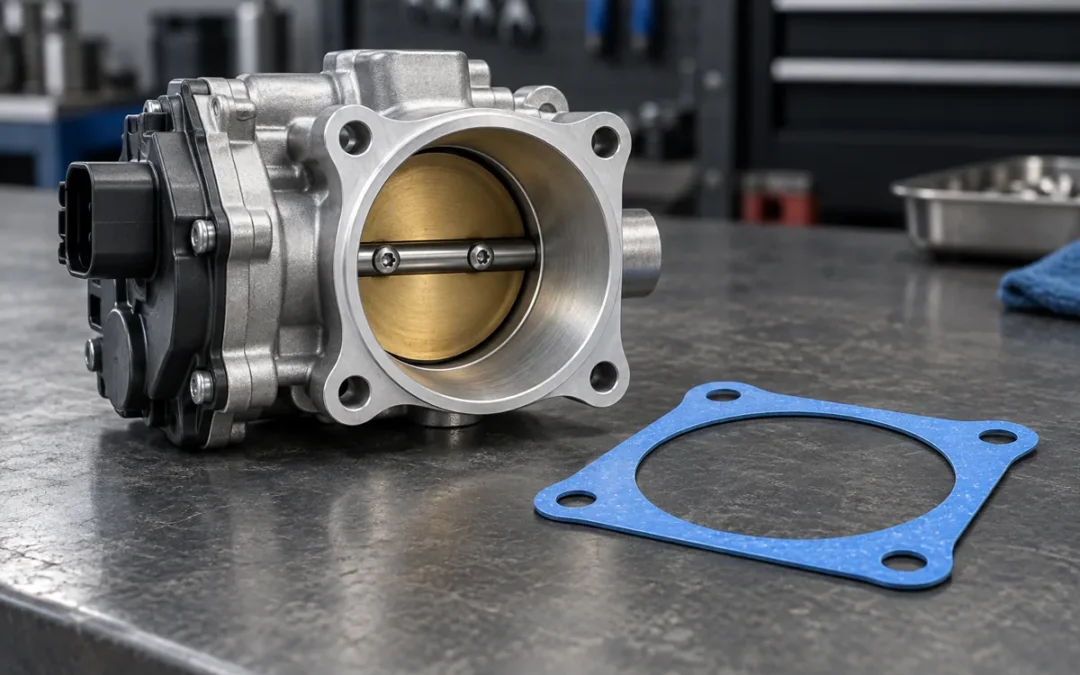
Estimated reading time: 13–15 minutes.
Table of Contents
For broader planning context before this throttle body gasket installation decision, read our earlier blog, Best Ram 2500 Diesel Years: Cummins Guide. It provides related repair or fitment context without replacing the engine-specific service procedure.
For sourcing context, compare the repair scope against VPGASKET engine gasket sets, Cummins engine gasket options, Cummins B-series gasket kits, 4025107 upper engine gasket kit, 3800487 ISB 5.9L lower gasket kit. VPGASKET supplies gasket repair kits and seals only; hard parts must be sourced separately.
When the decision depends on the wider engine layout, use these external references for diesel engine parts and system layout, Cummins engine assemblies and spare-parts context, engine diagnostic context, then confirm the exact configuration with the applicable ESN, CPL, OE number and service information.
throttle body gasket installation selection should start with the real repair scope, the engine identification evidence and the condition of every sealing surface—not with a model name or one isolated part number.
Why Most Preformed Gaskets Are Designed for a Dry Fit
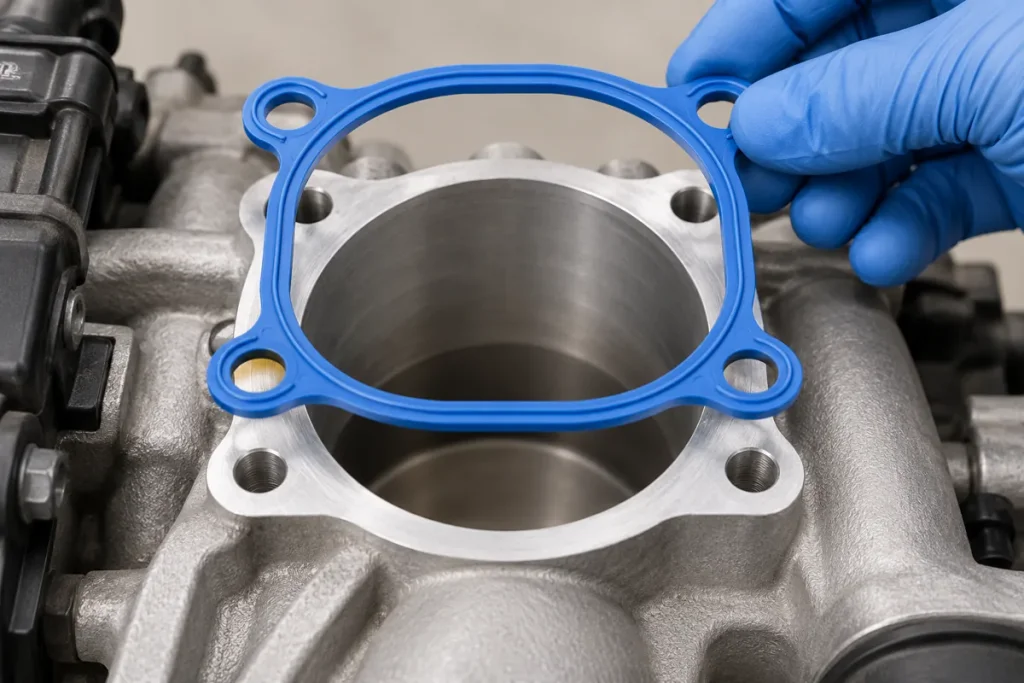
The fundamental reason behind a dry installation is that modern gaskets are engineered as complete, self-sufficient sealing systems. When you purchase a premium replacement seal from VPGASKET, whether it is a molded elastomer, an O-ring style seal sitting in a machined groove, or a carrier gasket with integrated silicone beads, the material itself is designed to provide all the necessary micro-sealing under clamping load.
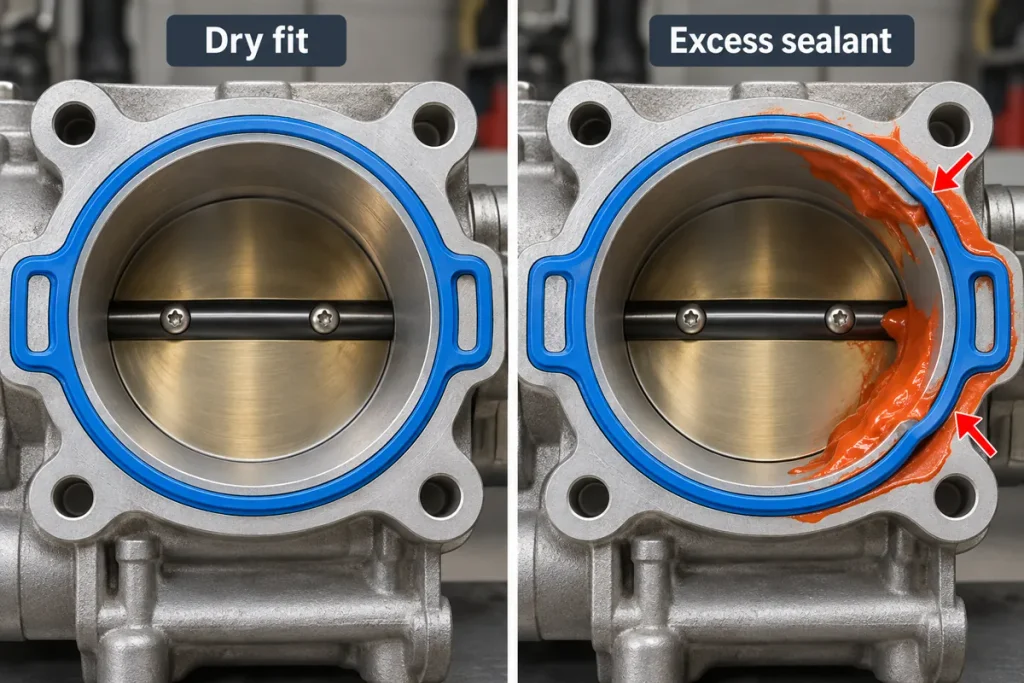
Applying RTV (Room Temperature Vulcanizing) silicone or other liquid sealants over these preformed beads defeats their engineering. Instead of gripping the metal flange, the liquid sealant acts as a chemical lubricant. As you tighten the throttle body bolts, the gasket bead can literally slide out of position, pinch, or alter the designed clamped thickness. Worse, excess sealant often squeezes inward. In a throttle body, squeezed-out RTV can disrupt airflow, interfere with the throttle butterfly valve, or break loose and be ingested into the engine, causing severe internal damage or fouling sensors.
Executable Criterion: If the gasket features a rubberized coating, raised silicone beads, or is a molded elastomer O-ring, it must be installed on a 100% dry and clean surface unless the official service manual dictates otherwise.
Throttle Body Gasket Material Decision Matrix
To understand why certain materials behave the way they do, we must evaluate them across operational parameters.
| Material Type | Temperature Tolerance | Pressure/Vacuum Handling | Typical Media Exposure | Flange Condition Requirement | Recommended Install |
|---|---|---|---|---|---|
| Molded Rubber / FKM | Up to 200°C (392°F) | Excellent vacuum retention | Air, fuel vapors, PCV oil mist | Requires flat, clean surface | Strictly Dry |
| Silicone Beaded Carrier | Up to 250°C (482°F) | High clamping pressure | Air, coolant (if heated TB) | Tolerates minor micro-imperfections | Strictly Dry |
| Traditional Paper/Cellulose | Up to 120°C (248°F) | Moderate vacuum | Air, fuel mix | Requires smooth, flat surface | Dry (or tack spray if OE specifies) |
| Multi-Layer Steel (MLS) | Up to 400°C+ (752°F+) | Extreme pressure | Exhaust gases (EGR ports), air | Requires ultra-smooth Ra finish | Strictly Dry |
Strengths, Limitations, and Non-Applicable Scenarios
Different gasket designs have specific limitations. Understanding these prevents misapplication during your service work.
| Material Type | Core Advantages | Primary Limitations | Non-Applicable Scenarios |
|---|---|---|---|
| Molded Rubber | Excellent recovery, reusable in some low-stress tests, perfect seal | Susceptible to harsh solvent attack; shifts if lubricated | Do not use if flange is deeply pitted; absolutely no RTV |
| Paper/Cellulose | Economical, conforms well to basic cast surfaces | Degrades with prolonged coolant exposure; sticks to flanges | Unsuitable for modern high-vacuum plastic manifolds |
| RTV (As Gasket Maker) | Fills large gaps on stamped steel | Cures slowly, extrudes easily, zero structural support | Never use as a primary throttle body gasket on modern vehicles |
When Service Information Permits Sealant
While "dry fit" is the golden rule, there are extremely specific edge cases where an Original Equipment Manufacturer (OEM) service manual might instruct the use of a sealant. This typically happens not on the flat face of the gasket, but at intersecting joints.
For example, if the throttle body mounting surface bridges a gap between two different castings (like a split intake manifold) or involves a stepped corner, the manual may require a tiny, 2mm to 3mm drop of RTV right at the T-joint or corner step.
Important ESN/CPL/OE Verification Boundary:
Do not assume sealant is required based on internet forums or previous experience with different engines. Engine configurations and supplier requirements change. You must verify the exact Engine Serial Number (ESN), Control Parts List (CPL), or OE service manual for your specific vehicle. Never apply absolute torque values or sealant maps without consulting the primary authoritative source for your exact hardware.
Composite Expert Guidance: The RTV Squeeze-Out Risk
"The most common mistake I see on the bench is 'insurance RTV.' A technician doesn't trust the rubber O-ring, so they coat the entire channel in silicone. When the bolts are torqued, that silicone needs somewhere to go. I've pulled throttle bodies where an extruded bead of cured RTV was literally holding the throttle plate open by 2 degrees, causing an unresolvable high-idle code. If a kit includes RTV, it is generally meant for specific corners or keyways, not as a frosting for the gasket face. Furthermore, applying unapproved sealants can cause a solvent attack on the elastomer gasket itself, breaking down the rubber prematurely."
— Andrew Collins
Diesel Diagnostics Specialist
Surface Preparation
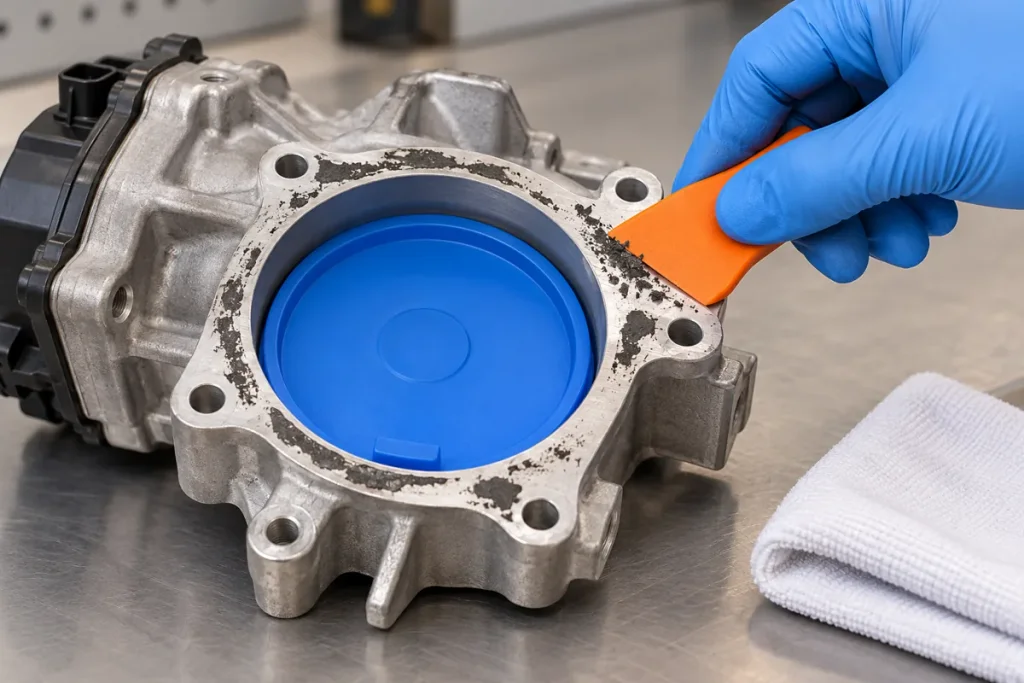
A dry gasket cannot do its job if the mating surface is compromised. Surface preparation is the most critical phase of the installation. The goal is to achieve a pristine, bare-metal (or bare-plastic) surface without removing any structural material or creating gouges.
Executable Criterion: Never use rotary wire wheels, abrasive sanding discs (like "cookie monsters"), or hardened steel scrapers on aluminum or composite intake manifolds. These tools will quickly create low spots or wavy surfaces that no gasket can seal.
| Step | Action | Tool/Chemical Required | Warning / Precaution |
|---|---|---|---|
| 1. Bulk Removal | Scrape off old gasket material | Plastic or brass scraper | Do not gouge aluminum or scratch plastic manifolds. |
| 2. Softening | Break down carbon and old adhesive | Non-chlorinated solvent | Ensure solvent is safe for composite/plastic intakes. |
| 3. Wiping | Remove all oily residue | Lint-free microfiber or shop towel | Avoid paper towels that leave lint in the intake tract. |
| 4. Inspection | Check for pitting, warping, or cracks | Straight edge & feeler gauge | If warpage exceeds OE spec, the flange must be machined or replaced. |
Illustrative Customer Scenario: High Idle After "Extra Safe" Sealant Application
The Problem: Mark, a DIY enthusiast, was replacing his throttle body gasket to fix a vacuum leak. Wanting to be "extra safe," he coated both sides of his new VPGASKET premium molded rubber seal with high-temp red RTV. Upon starting the car, the engine immediately surged to 2,500 RPM and threw a Check Engine Light.
— James Carter
Independent Rebuild Shop Owner
The Diagnosis: When Mark tightened the bolts, the RTV acted as a lubricant. The rubber seal squeezed completely out of its groove on the bottom edge, creating a massive vacuum leak. Furthermore, RTV squeezed into the throttle bore, interfering with the plate.
The Solution: Mark had to remove the throttle body, spend two hours cleaning the cured RTV out of the plastic intake manifold, and purchase a second gasket. He installed the second one completely dry, torqued it to spec, and the idle returned to a perfect 700 RPM.
Bolt Tightening and Flange Distortion
Even with a perfectly clean surface and a high-quality dry gasket, the installation can fail if the throttle body is tightened incorrectly. Throttle bodies are precision-machined components; uneven clamping forces can warp the housing, causing the throttle plate to bind or creating micro-gaps at the gasket interface.
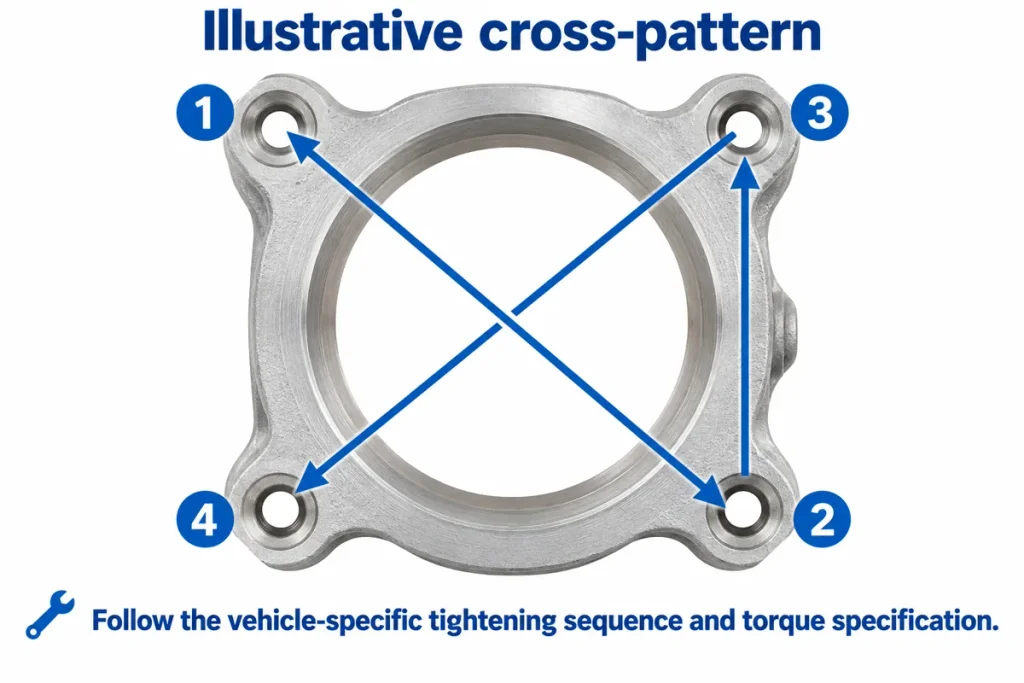
Executable Criterion: Always thread all fasteners by hand first. Then, tighten them in a crisscross or star pattern in two to three gradual passes, rather than tightening one bolt fully before moving to the next.
| Issue / Symptom | Potential Cause | Verification Method | Corrective Action |
|---|---|---|---|
| Throttle plate binding | Uneven bolt torque warping housing | Manually actuate throttle to feel for friction | Loosen all bolts, retorque in star pattern to OE specs. |
| Vacuum hiss at one corner | Flange pinched / gasket shifted | Smoke test or localized carb spray test | Inspect gasket for damage; replace if crushed, ensure dry fit. |
| Stripped threads in intake | Over-torquing beyond OE spec | Bolt spins freely without tightening | Repair with thread insert (if metal) or replace manifold. |
Interactive Decision Tool: Dry Fit or Sealant?
Not sure how to proceed with your specific setup? Use this interactive checklist to determine the safest installation method based on standard industry practices.
Note: This tool provides general guidance. Always defer to your specific OEM service manual.
Installation Method Decision Tool
Leak Check After Reassembly
After you have completed the installation—paying strict attention to clean surfaces, dry fitment, and proper torque—you must verify that the seal is completely airtight. A vacuum leak here will allow unmetered air into the engine, causing lean codes (like P0171 or P0174) and erratic idle.
| Check | Action / Verification Standard | Result Needed to Proceed |
|---|---|---|
| 1. Gasket ID / Direction | Verify part numbers and "UP" or "FRONT" tabs prior to bolt installation. | Gasket aligns perfectly with all ports. |
| 2. Dowel Pins | Ensure alignment pins/sleeves are seated in the throttle body. | Housing sits flush without rocking. |
| 3. Surface Prep Check | Ensure both flanges were wiped dry of solvents before mating. | No residual fluid on flanges. |
| 4. Torque Specs | Check fasteners against specific OE ESN/CPL manual data. | Bolts torqued evenly in star pattern. |
| 5. RTV Cure Time | If OE required RTV at corners, wait for specific cure time before starting. | Typically 1–24 hours depending on RTV type. |
| 6. Visual / Audio Check | Start engine, listen for whistling or hissing near the flange. | Silent operation at the joint. |
| 7. Idle Stability | Monitor RPMs once the engine reaches operating temperature. | Smooth, steady idle (typically 600-800 RPM). |
If you suspect a leak, a safe diagnostic method is to spray a small amount of throttle body cleaner lightly around the mated flange while the engine is idling. If the RPM changes suddenly, you have found a breach in the seal.

Recommended YouTube video: Throttle Body Gasket Installation: 5 Critical Dry-Fit Rules video guide
Frequently Asked Questions (FAQ)
Can RTV be used on a paper gasket?
Generally, no. Modern paper and cellulose gaskets are often treated with a specialized coating that swells slightly when exposed to heat and fluids, creating a seal. Thick RTV will prevent this and can cause the gasket to tear. If you need help keeping a paper gasket in place during assembly, use a specialized aerosol gasket tack, not silicone.
Can the throttle body gasket be reused?
It is highly discouraged. Even molded rubber gaskets take a "set" (permanent compression) when clamped and subjected to engine heat. Reusing an old gasket significantly increases the risk of a vacuum leak. Always replace it with a fresh VPGASKET seal.
How long should sealant cure?
If the OE manual specified sealant at a specific corner or joint, you must refer to the sealant manufacturer's directions. Many RTV silicones require 1 to 2 hours to become "tack-free" and up to 24 hours to fully cure before the engine should be started or exposed to fluids.
What happens if I get solvent on a molded rubber gasket?
Aggressive chemicals like brake parts cleaner or chlorinated solvents can attack FKM, silicone, or polyacrylate gaskets, causing them to swell, weaken, or degrade. Only clean flanges before the gasket is placed, and let the solvent evaporate entirely.
Why does my engine idle high after replacing the gasket?
A high idle usually indicates unmetered air is bypassing the throttle plate. This is often caused by a vacuum leak from a rolled gasket, a pinched O-ring, failure to clean the flange properly, or RTV squeeze-out creating a gap. (For more details, visit our guide on /throttle-body-gasket-replacement-symptoms/).
Conclusion & VPGASKET Support
Proper gasket installation relies heavily on modern engineering. Trust the design of preformed elastomers, paper composites, and MLS layers. Keep the installation clean, keep it dry, and leave the RTV in the toolbox unless your service manual explicitly asks for it at a specific joint.
Getting the installation right starts with sourcing the right materials. VPGASKET supplies premium gasket repair kits and seals engineered for precise fitment and OEM-level sealing performance. By selecting the correct material and hole-pattern for your exact application, you eliminate the guesswork.
CTA: Ready to ensure a perfect, leak-free repair? Browse our comprehensive catalog to buy the correct material and hole-pattern preformed gaskets today.
Illustrative Customer Scenario
We stopped ordering by model name alone and used the verification sequence in this throttle body gasket installation review. The receiving team found the scope mismatch before the engine was opened, which protected the repair schedule.
— James Carter
Independent Rebuild Shop Owner